BM adding administrators, page, ad account and assigning Assets
BM adding administrators, page, ad account and assigning Assets
I. Adding Administrators
Step-by-step guide:
1. Access Business Settings:Log in to your Meta Business Suite, then click Settings in the bottom-left corner.
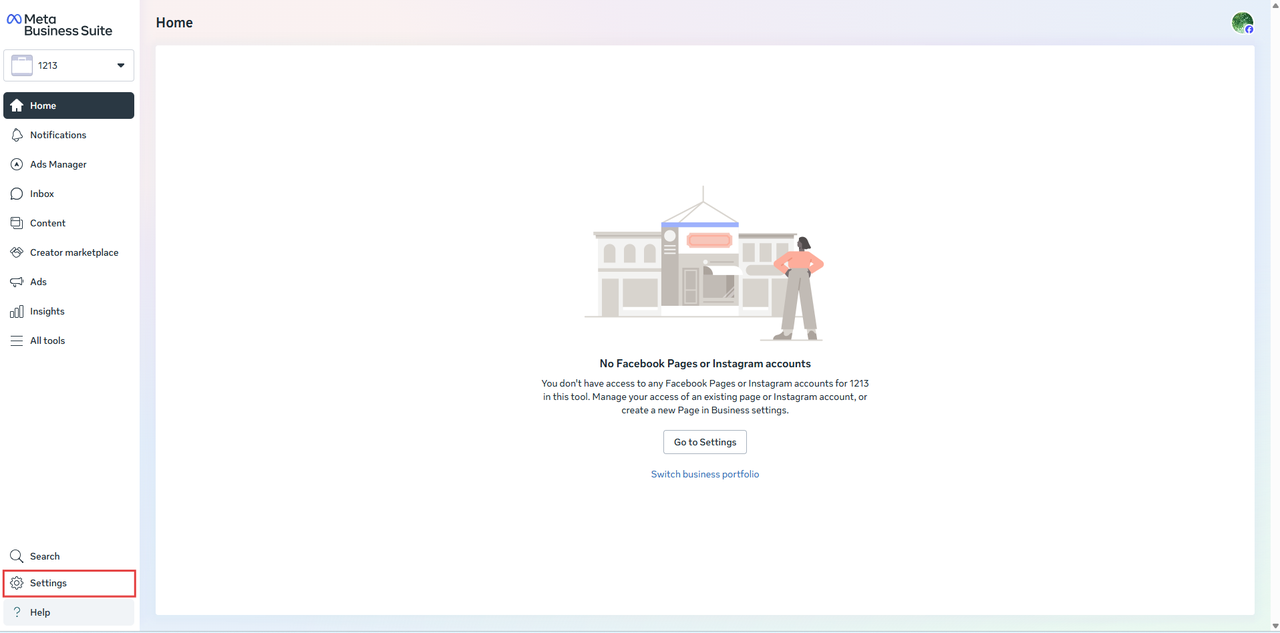
2. Open People Management: In the left-hand menu, select People, then click the prominent + Add People button.
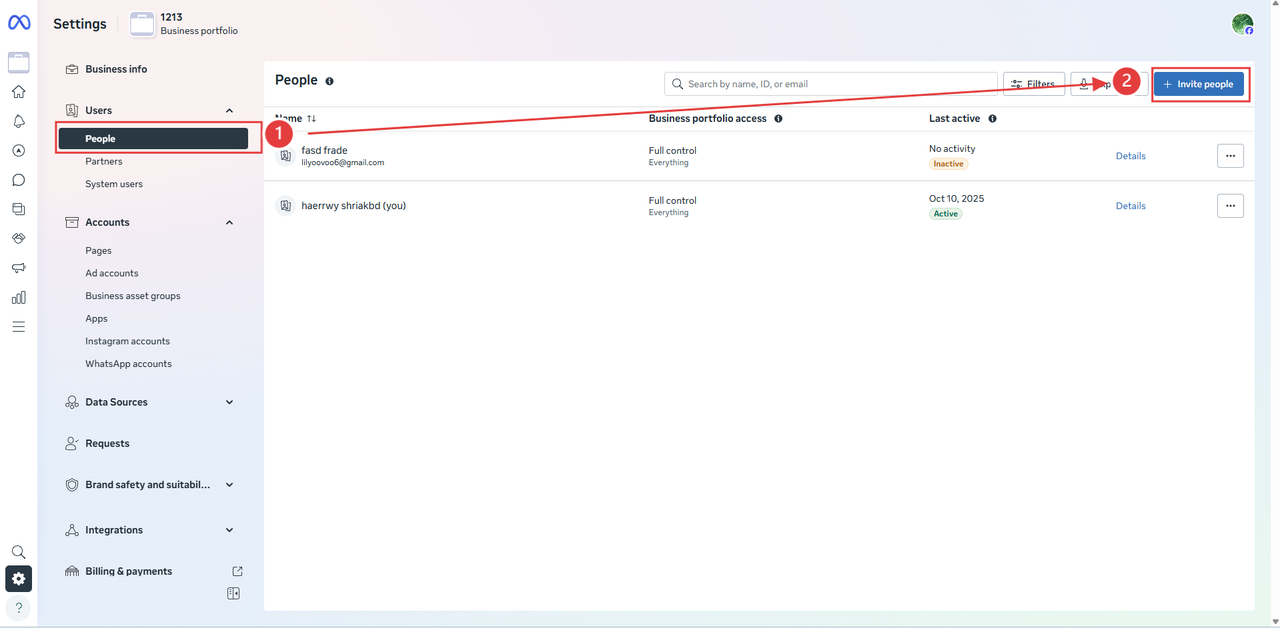
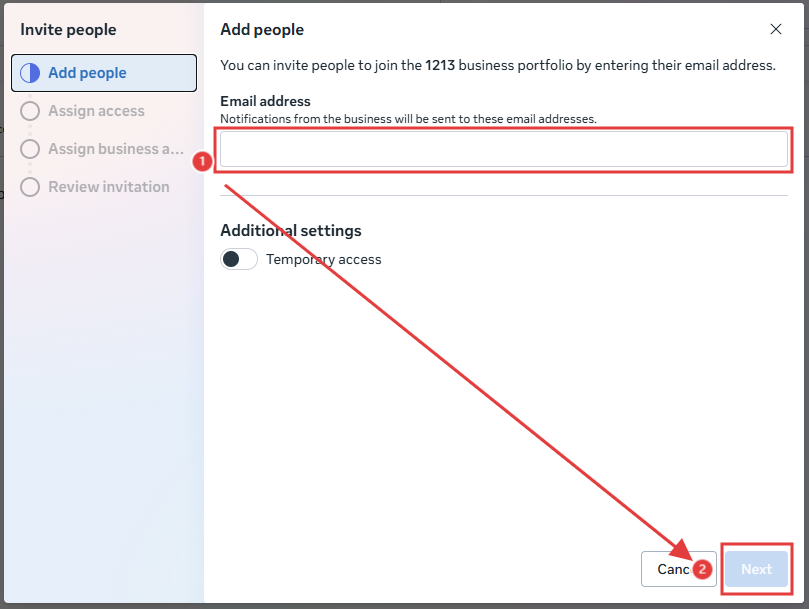
3. Send Invitation:Enter the person’s email address in the pop-up window.If this is a temporary collaboration, check the Temporary Access option. Click Next to continue.
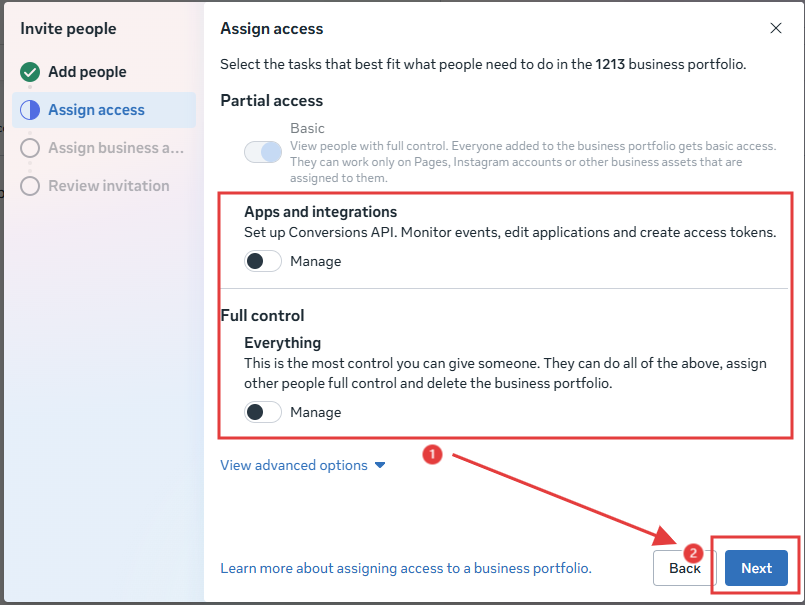
4. Assign Role Permissions: This step is crucial. Choose the access type (e.g., Employee Access) to define what the user can see and do within BM.
5. Link Assets:Select the specific assets (e.g., Pages, Ad Accounts) you want to assign to the new member and define their role (e.g., Admin, Editor, Advertiser). If you’re granting partial access, make sure to enable all task-based permissions required for their duties.
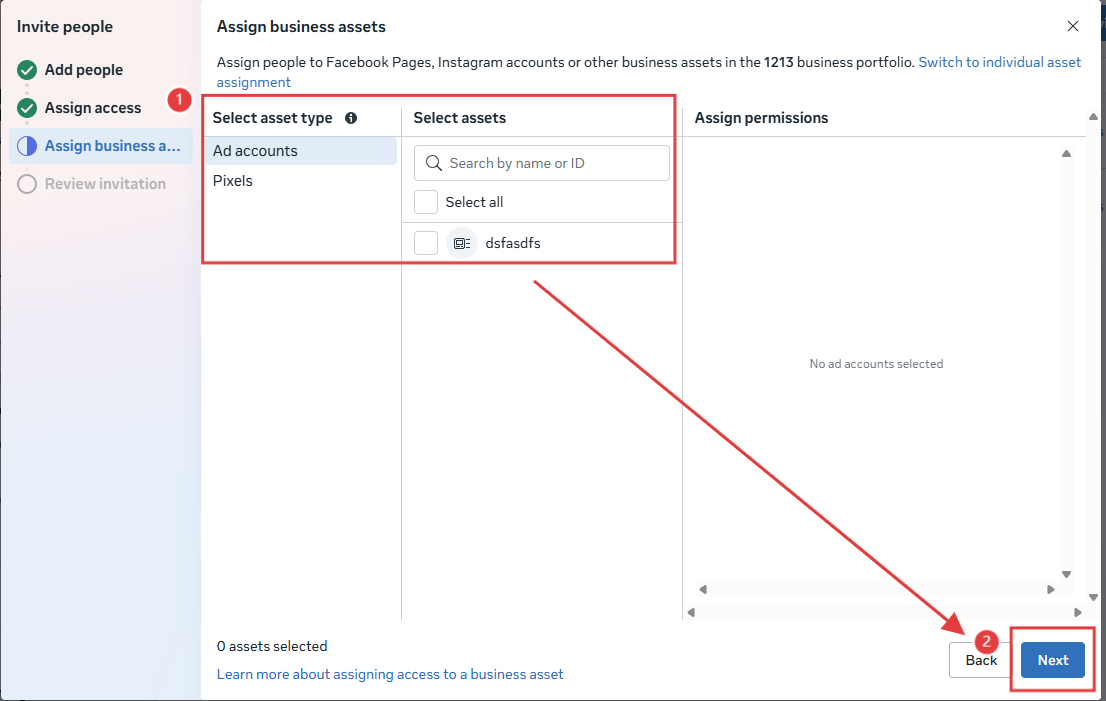
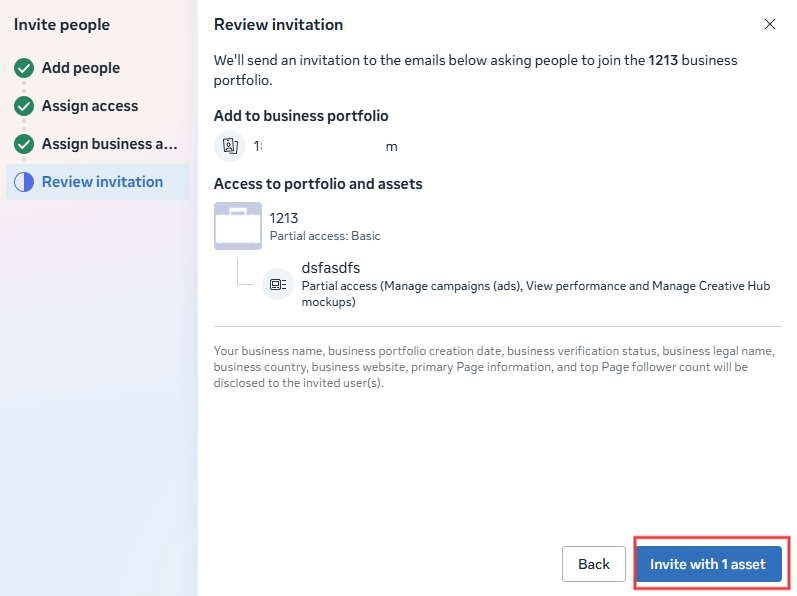
6. Finalize Invitation:Review all details and click Send Invitation.The recipient will receive an email with an access link — once accepted, they officially join your BM workspace.
II. Adding a Facebook Page
Once your team is ready, the next step is to secure your main operational asset — your Facebook Page.
Integrating your Page into BM allows for centralized management, ensuring security and consistency across your operations.
Steps:
1. Access Page Settings: From the BM Settings panel, go to Accounts → Pages.
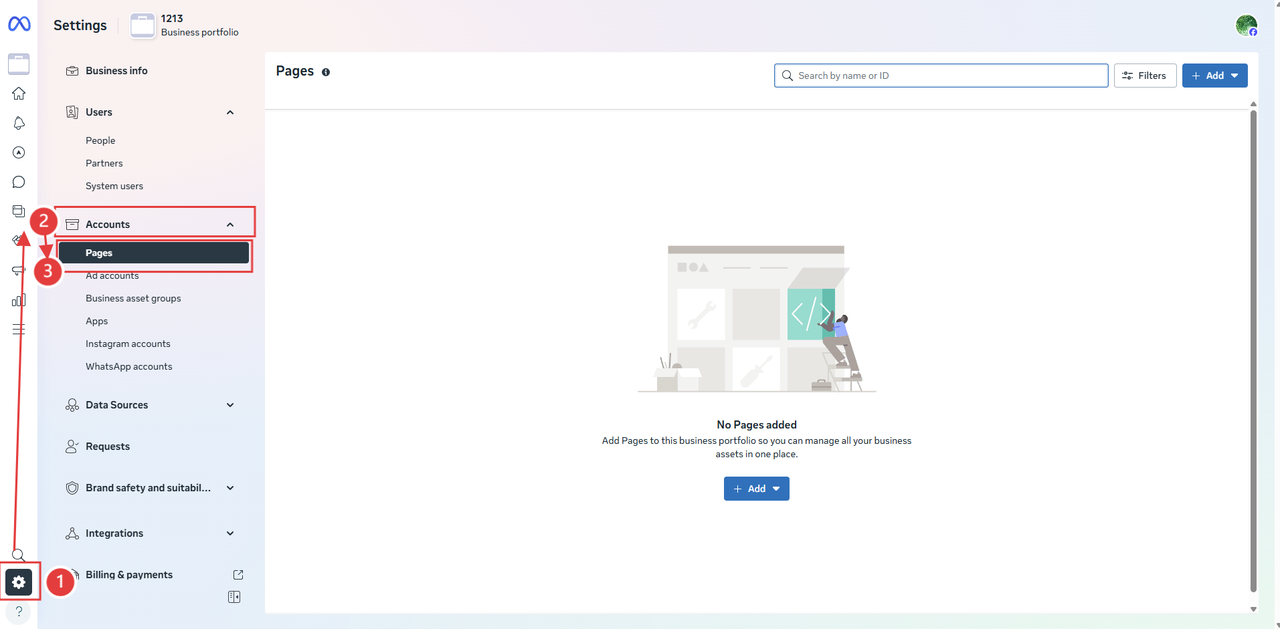
2. Start the Add Process:Click the + Add button.
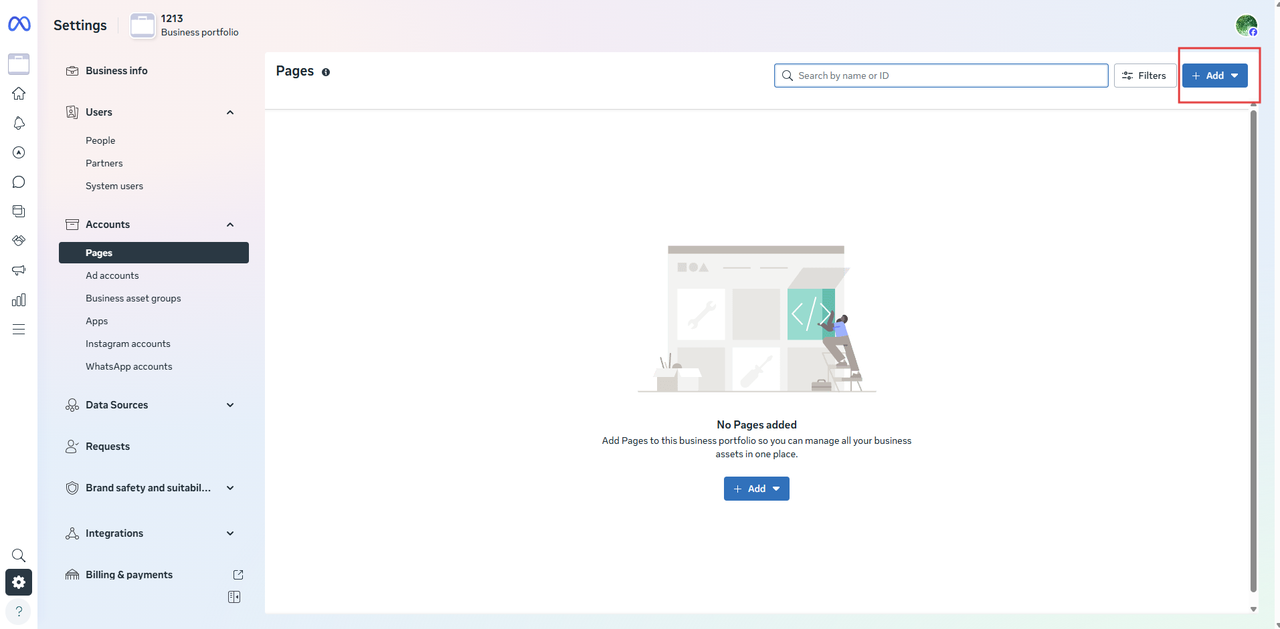
3. Choose Add Method: Select Add a Page from the dropdown menu.(You may also create a new Page or request access to another BM’s Page.)
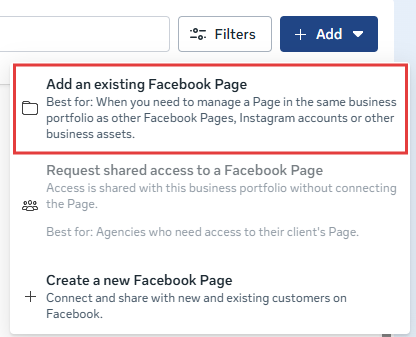
4. Enter Page Details:Type the exact Page name or URL in the search bar. The system will auto-detect the matching Page.
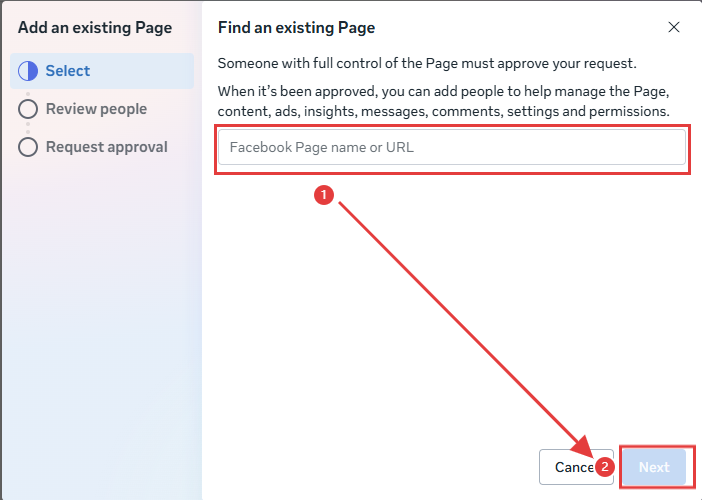
5. Confirm and Add:Click Next, review the details, and confirm by selecting Add Page. If the Page is unclaimed, access will be granted immediately; if it’s owned by another BM, approval from their admin is required.
✅ Result: Once added, the Page is officially managed under your BM. All authorized team members can collaborate efficiently — avoiding the risk of “page loss” when individual accounts are deactivated.
III. Connecting Ad Accounts
Meta provides three main methods to connect an Ad Account:
- Create a new Ad Account
- Claim an existing one
- Request access to another BM’s Ad Account
Core Steps for Creating a New Ad Account:
- Applicable Scenario: Your business is just getting started, and you need to apply for a brand-new ad account.
- Important Reminder: Ad accounts created within a Business Manager (BM) are permanently bound to that BM and cannot be deleted or transferred. New BMs have a limited number of ad accounts they can create.
- Operation Path: Settings > Accounts > Ad Accounts > Add > Create a New Ad Account > Fill in the account name, time zone, currency, and other details.
⚠️ Key Reminder:
After adding the account, don’t forget to assign specific permissions to your team under People or Ad Account Settings.
IV. Assigning Assets
1. Preparation: Ensure you have full administrative access to the BM, and that all members to be assigned have already joined.
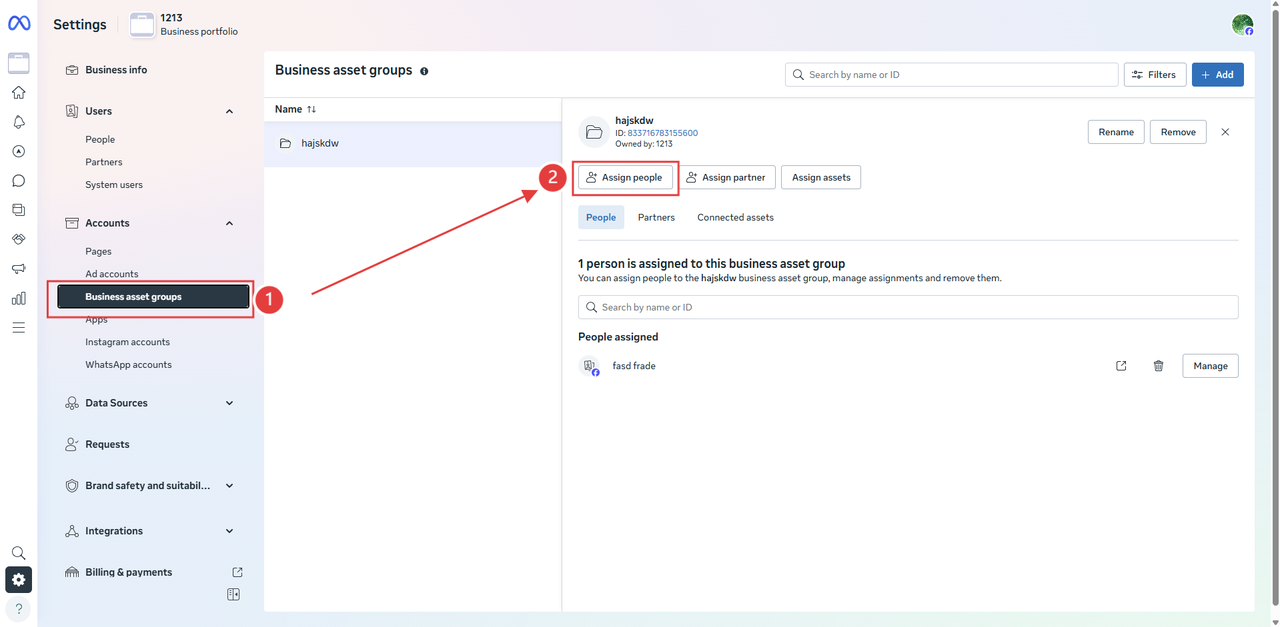
2. Access Business Asset Groups: Go to Settings → Business Asset Groups.。
3. Select or Create a Group: Choose an existing asset group or create a new one (e.g., “Brand A Marketing Team”).
4. Assign People: On the group detail page, click Assign People.
5. Set Permissions
- Select the members you want to authorize.
- Define their permissions for the entire asset group or individual assets within it.
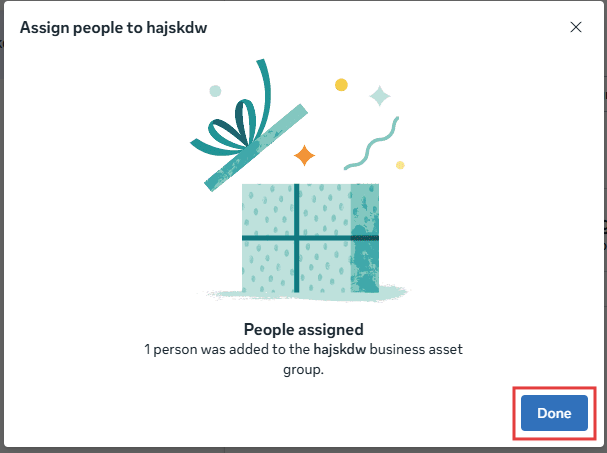
6. Final Step: After confirming that all permission settings are correct, click Done to activate the account.
Was this article helpful?